Before you should start to unlock your iPhone. You should know which iPhone you have.
This manual will take you step by step to make your iPhone 2G working with any network.
We will choose the best possible way available till today to make your iPhone working on any network.
All those who have a bricked iPhone can also follow these steps.
Which iPhone do you have ?
1. iPhone 2G (The older iPhones are called iPhone 2G. You can see this image to check which iPhone you have.)
2. iPhone 3G ( The newer iPhone is the iPhone 3G. You can see its image here.
If you have iPhone 2G, Please follow the following steps. For iPhone 3G procedure there is another post coming up on this blog.
iPhone 2G – Step by Step procedure for Windows users.
iPhone 2G users are more lucky, The latest version of iPhone can be unlocked and jailbroken to use any network simcard.
Phone will work fully with all features using this procedure.
However iPhone 3G can only be jailbroken but cannot be unlocked, The only solution in this world to unlock the iPhone 3G is Rebel Simcard.
Please Note : With this procedure you will lose all data on your iPhone , and it will become like a new out of the box phone. This means you will lose all your contacts, images, etc…
1. You should download the following softwares.
a. iTunes 7.7 Download from apple.com
b. Firmware 2.0 for iPhone (Tested) Download Part1.Download Part2.
c. WinPwn Download here or find a latest version from http://www.winpwn.com
d. .Net 2.0 Framework Download here.
e. 3.9BL
f. 4.6BL
After downloading all this,
Install
1. iTunes 7.7.
2. .Net 2.0 Framework.
3. WinPwn.
Please note
– You MUST do a full uninstall of winpwn before installing the new version
– Make sure you have the latest version of iTunes ( Currently 7.7)
– WinPwn uses 300MB of ram at peak due to the ipsw being extracted in memory
– If you already have service with AT&T do not activate or install Youtube Fix
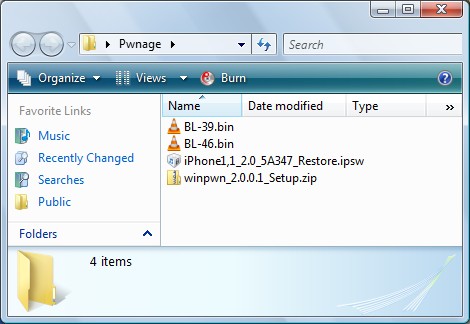
Create a folder on your desktop called Pwnage. In it place the following files: Winpwn , 3.9BL , 4.6BL , and the latest 2.0 firmware.
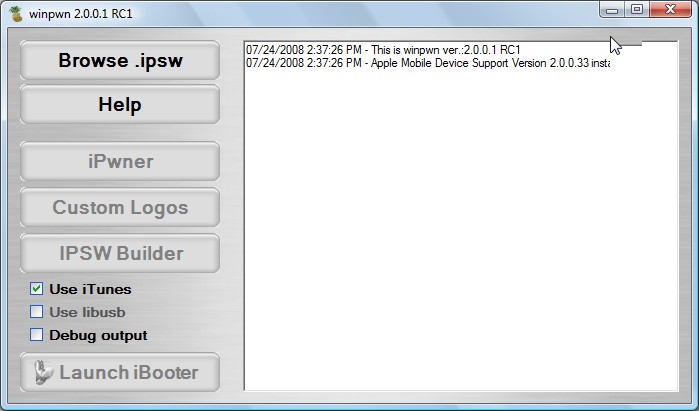
Install WinPwn by extracting the downloaded zip from Step One and running the setup executable. Once WinPwn has been installed it will put a shortcut icon on your desktop. Double click to launch the application.

Once WinPwn has opened click the Browse .ipsw button.
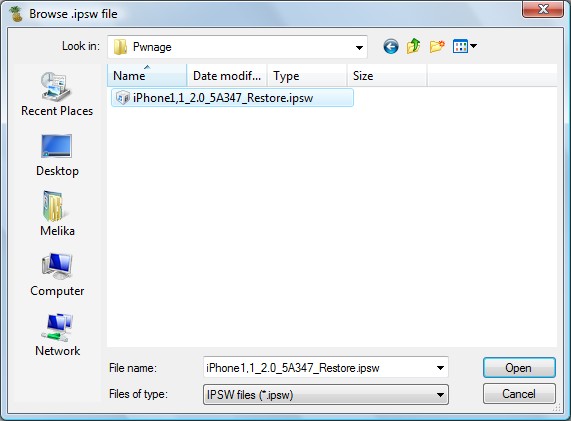
Locate the 2.0 firmware file (iPhone1,1_2.0_5A347_Restore.ipsw) from the Pwnage folder on your desktop and click Open.
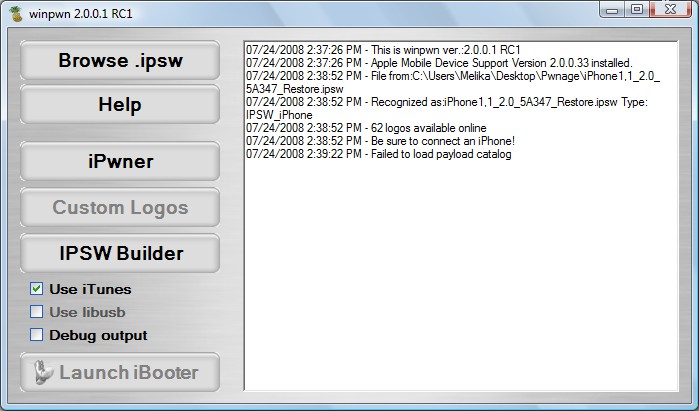
WinPwn will check the firmware to make sure its valid. Now click the IPSW Builder button
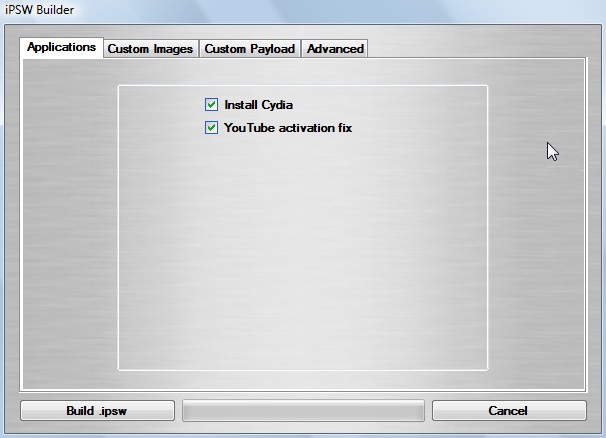
The IPSW Builder window will open to the Applications tab. Check to select Cydia and if you are not on AT&T then check to select YouTube Fix.
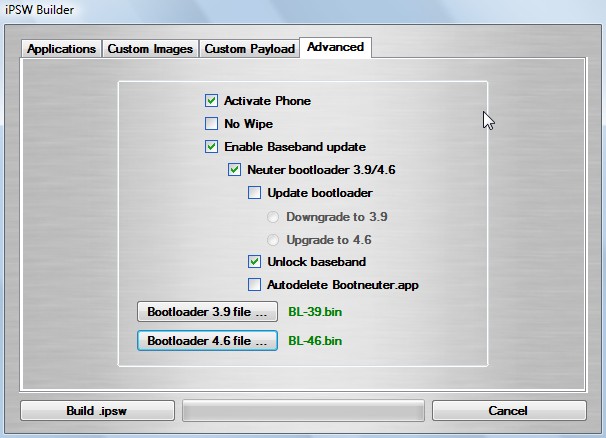
Click to select the Advanced tab. Check to select: Activate Phone, Enable Baseband update, and Unlock baseband. Same settings as shown in this image.
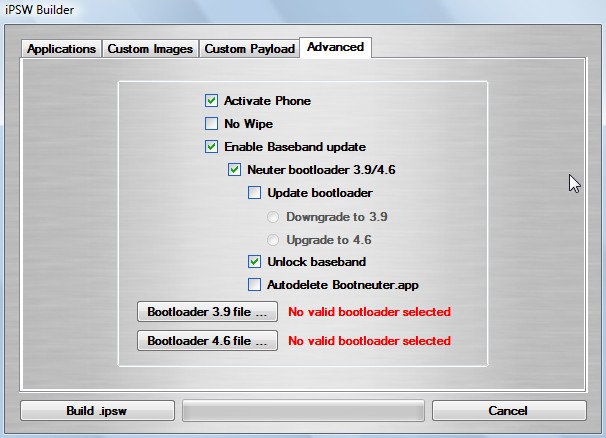
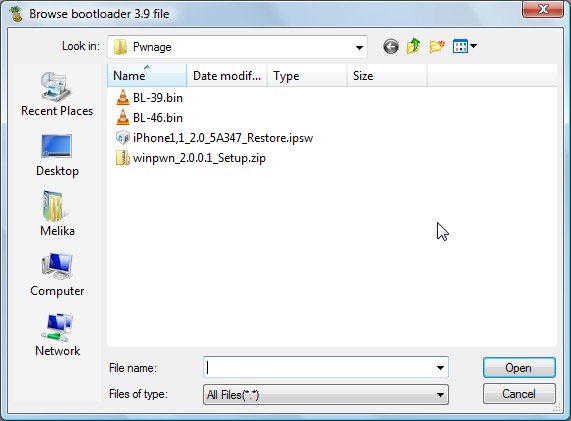
We will also need to load the Bootloader files. Click the Bootloader 3.9 button and then select the BL39.bin file in your Pwnage Folder. Then click the Bootloader 4.6 button and select the BL46.bin file in your Pwnage Folder.
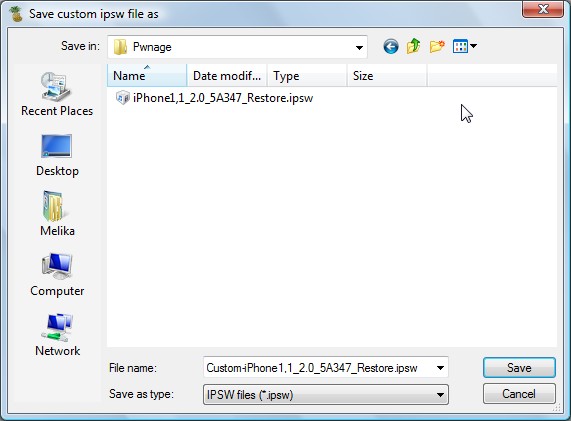
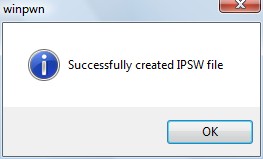
Click the Build .ipsw button at the bottom left to build your custom ipsw firmware file. Navigate to your Pwnage folder and click the Save button
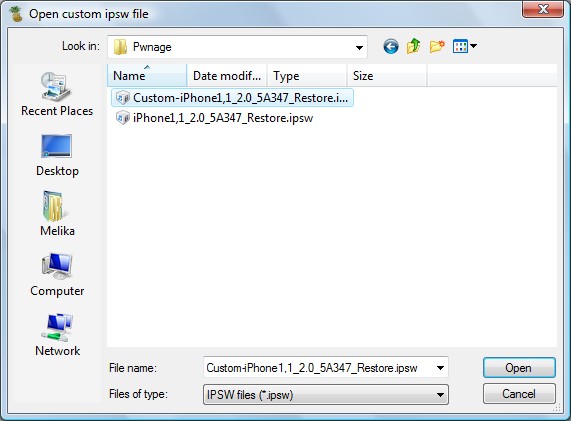
Once WinPwn has finished creating your custom firmware then click the iPwner button from the main menu.
Select the custom firmware file we just built from the Pwnage folder on your desktop and click the Open button.
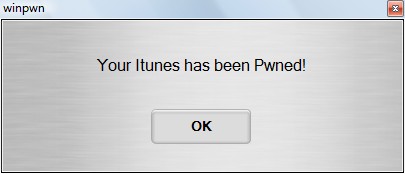
You will then be notified that your iTunes has been Pwned!
Next we will need to put the iPhone in the DFU mode and restore using iTunes. To put your iPhone into DFU mode please follow these instructions!
Press and hold the Home button and the Sleep/Wake button at the same time.
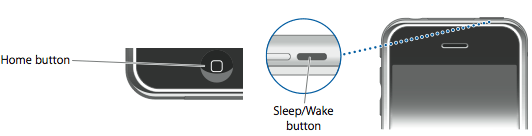
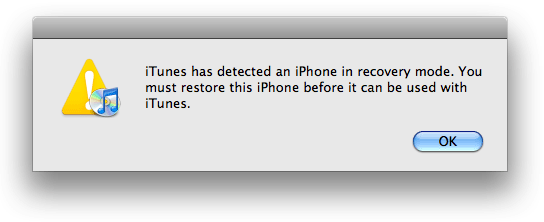
After exactly 10 seconds release the Sleep/Wake button. Continue holding the home button until you iTunes pops up a message telling you that it has detected an iPhone in recovery mode.

The iPhone screen will remain black like this:

If you see the itunes logo and cable here, then you are doing wrong!!! The phone must be black screen like this. Most users make this mistake, be careful.
Hold down Shift and click the Restore button in iTunes.
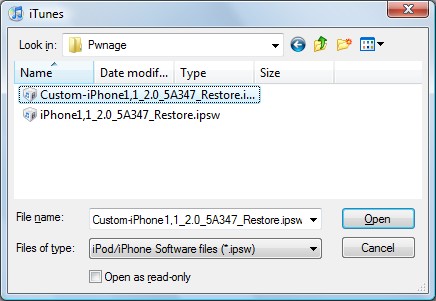
A popup window will appear asking you to select your firmware. Select the Custom firmware file we saved in the Pwnage folder and then click the Open button.
Once the restore is complete a software will automatically run on your iPhone screen.
It will take around 5-10 min to finish, and your phone will be unlocked and jailbroken.
Now just insert your simcard and use it with any network simcard!!
Tags: iphone 3g 2.2 unlock, ismartsim, proxy sim, rebel sim, rebel simcard blog 2.2, Rebel Simcard I, rebelsim, rebelsimcard, simcard unlock, universal sim, unlock iphone, unlock iphone 3g, www.rebelsimcard.com

December 14, 2008 at 4:03 pm |
[…] Rebelsimcard » Blog Archive » How to Unlock iPhone 2G and upgrade … […]